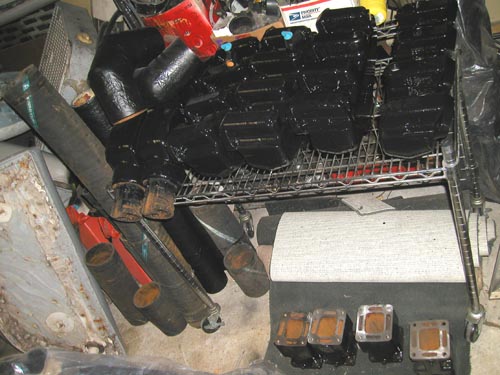
What had to be done is done. The exhaust was removed from the 19 (I had to take the manifolds off to get the upholstery out for re-doing it anyway). All cleaned up and broken down so they are ready for the riser extensions to be installed. Painted them up pretty too.
I also robbed the risers off of the Monza that match the set that came off of the 19 and used a set I had for the race boat to replace them. Not that they function any different just a different style and weigh about 10lbs difference.
10lbs don't sound like much but you times that by two, add in the loss of weight from the aluminum manifolds and over all it adds up to be about 140lbs dropped from the boat. Not to bad for lefts overs form other upgrades.
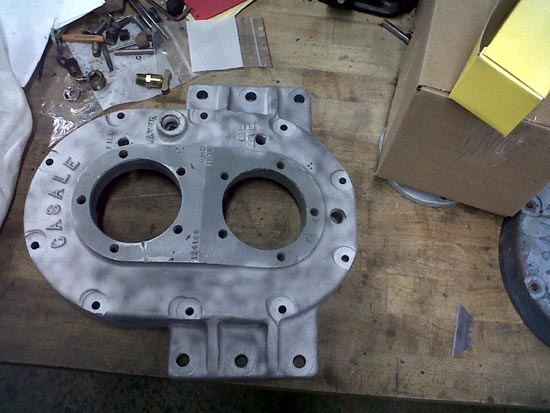
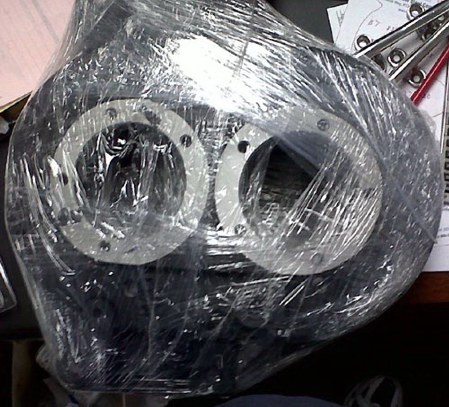
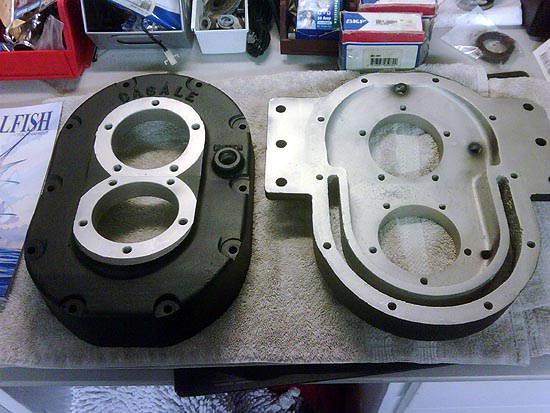
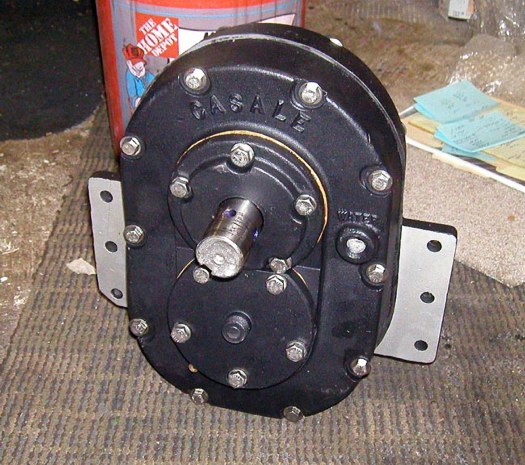
Cases heading to powder coating this week. Took the time to surface them so they mate properly even though the gasket is pretty thick. Re-tapped all holes, bead blasted inside and out. It's been beat on a few times, but it looks pretty good. Gears bored and fit to shafts. As soon as it's coated I'll measure up and order the hardware to assemble it.
Scott is on the ball. More work done. This is going to be the nicest part of the boat. For what it has to do, I hope so. It's a shame it's going to be hidden under the deck. I did make the deck able to "roll up" for the show off part of owning this boat so some will see it.
Even though I am not doing the V drive and at the moment and I'm kind of preparing for another project, the race boat is still first an foremost on my mind. I want this thing done ASAP for so many reasons. One of the biggest is I really dont like starting another project when the first is not done. I see so many folks start projects like this but it sits and never get 100% done because they move on to other things. Everyone knows the guy that has 3+ boats sitting in his yard that are each 90% done but never finished. Im not that guy. One and done, move on is my way.
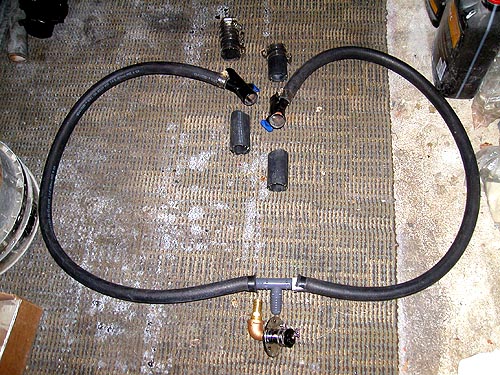
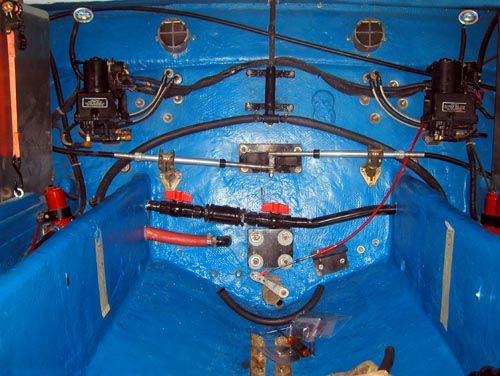
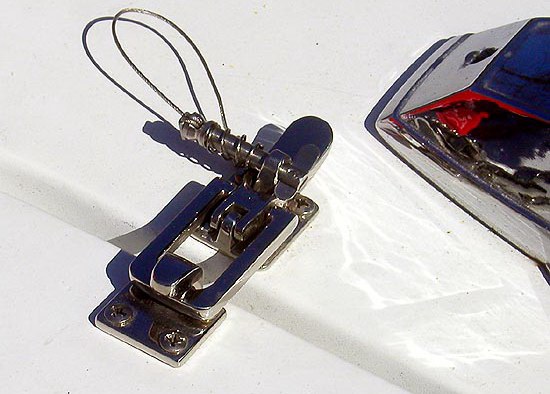
As I was preparing for that other project an idea hit me for the race boat. I dont want to have to pull a garden hose through the boat just to flush the motors and having a plunger stuck up under the transom pickup didnt sound like a good idea either. I had pictured it falling over, running a motor dry, burning up everything. Then I found a couple flush kits on eBay a while back. Not sure what I was going to do with them at the time because they were the type that where you plugged the hose in at required this special connector and the whole thing was not something you would put outside of a boat. Maybe attached to a motor but that defeated the whole not dragging a hose inside the boat thing. Just then the Monza Project came up with the perfect solution. A Sea Dog fresh water inlet. Basically a plug in hose connector. So between the kits I had and the connector I just got this is what I came up with. I'm only useing one inlet. Keeps the transom clean and I'm only going to be able to run one motor at a time on well water anyway.
Now to find a place on the transom for the connector. Not as easy as you would think. It has to look right.
It hit a whopping 41 degrees today and after what its been like it almost felt like summer (except for it being 41 and the piles of snow sitting around ).
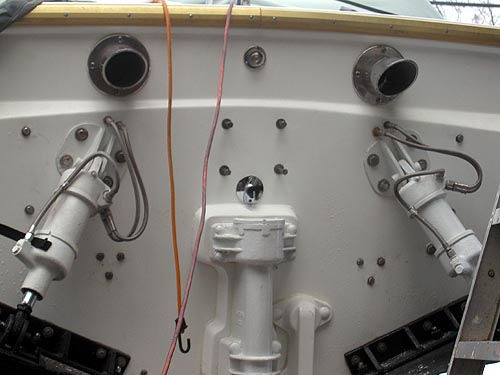
I was concerned about mounting the inlet to the transom and I found it was justified. The one place I wanted it there was something behind it blocking the way. So I had to unbolt the four bolts and remove the transom cleat bracket to get a clear path. It also needed to be shorten it up a little. It's just as solid as before. More cosmetic they anything and it's not like I would let anyone pick this or any boat of mine with just a cleat. The transom fiberglass is almost 5/8ths of an inch thick. Someone trying before stretched out the bow cleat already. Never again.
The inlet should be fine where I installed it. It does looks a bit shinny and new but after a little time it will dull up a bit and most will never notice it. When the boat is on the water it should be even less noticeable. I would have gave it a test run but I would have had to drain all the water after being the temps were dropping down to the high teens tonight. Freeze damage before it even has motors in it is not an option.
Cut the inlets into the PVC lines that run beside the stringers. A chunk of hose on both sides with a couple hose clamps and a line up to a T that is attached to the inlet.
When I'm ready, plug the garden hose into the inlet, turn off the two orange handles to the pickup and let it flow.
If I was going to use some sort of antifreeze to winterize I can use the same set up.
This boat has to be easy to operate. Just getting it in the water is already a pain in the ass. No reason to compound things when I get it home.
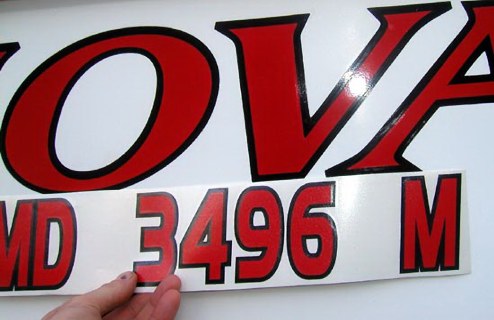
Took me forever to find all the proper labels. Then a found a little company in the back of one of my books that had them all and a hundred others.
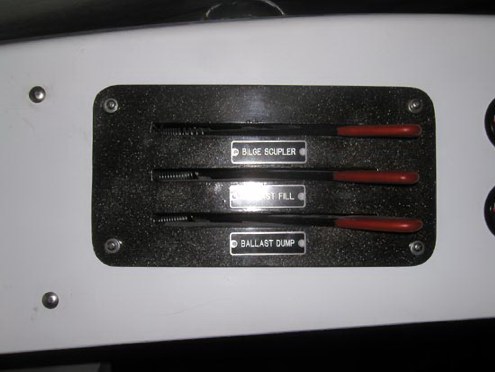
These, I had to breakdown and have them made. Its not like a Ballast Fill tag is common so the 3 tags cost almost as much as what it did to make the control handles.
I thought I was out of luck. I contacted Wayne (who did the other decals) about doing it but he got rid of all his vinyl stuff so I was not sure what I was going to do. So I started the hunt. A hundred emails back and forth (not so many back, for some reason these folks seem to think they dont need to contact potential customers back for some reason). After another frustrating night of looking and a couple beers I took a shot at a design in the off chance it was close.
Not to bad.
It may not be able to go any faster then the current will drag it at the moment but when it can its ready.
Im sad I had to put them on at all but it had to be done.
And then there was an email from Scott. "Its all in one place again."
Being warm out Im looking for things to do. Anything no matter how small just to get it out of the way. Still waiting on some stuff for the other project I have going on that would have filled these couple warm days in the middle of February so I came up with this just to fill in a little of that time.
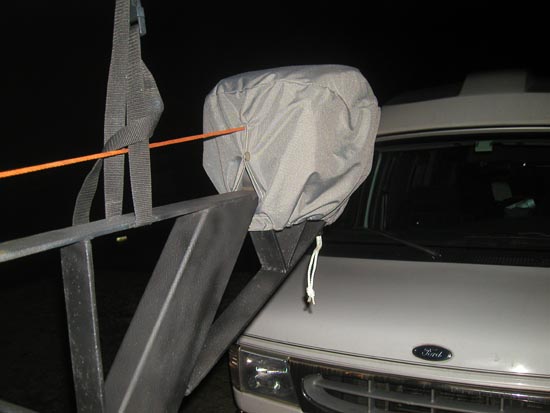
Never did like letting this winch just sit out in the weather so after a year and a half I took the bag that the Monza's boat top came in (not like I was going to use it for anything), cut it down, added a couple snaps and a draw string to be able to snug it up and this is what I got. Not bad for 20 minutes work with a sewing machine.
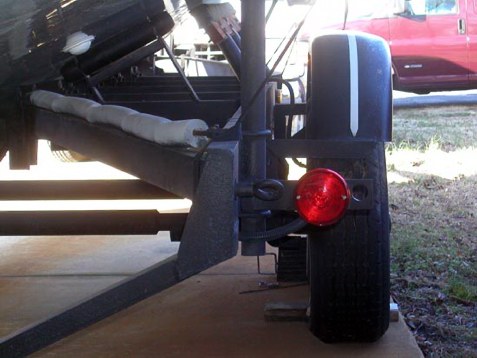
With nothing better to do and needing lights for the 19s trailer I thought why not replace the ones on the race boat trailer. Ya, that makes sense.
Just trying to get the trailer done awhile back I just bought a set of lights not thinking about it. After I installed them it dawned on me that they were no where like the originals but they worked and I moved on to other stuff.
Now, like I said, I need lights for the 19s trailer so being the lights on the R/B trailer have been used about three times I bought some that look exactly like the originals and now I can use the lights off of it on the 19s trailer.
Being warm out Im looking for things to do. Anything no matter how small just to get it out of the way. Still waiting on some stuff for the other project I have going on that would have filled these couple warm days in the middle of February so I came up with this just to fill in a little of that time.
Never did like letting this winch just sit out in the weather so after a year and a half I took the bag that the Monza's boat top came in (not like I was going to use it for anything), cut it down, added a couple snaps and a draw string to be able to snug it up and this is what I got. Not bad for 20 minutes work with a sewing machine.
With nothing better to do and needing lights for the 19s trailer I thought why not replace the ones on the race boat trailer. Ya, that makes sense.
Just trying to get the trailer done awhile back I just bought a set of lights not thinking about it. After I installed them it dawned on me that they were no where like the originals but they worked and I moved on to other stuff.
Now, like I said, I need lights for the 19s trailer so being the lights on the R/B trailer have been used about three times I bought some that look exactly like the originals and now I can use the lights off of it on the 19s trailer.
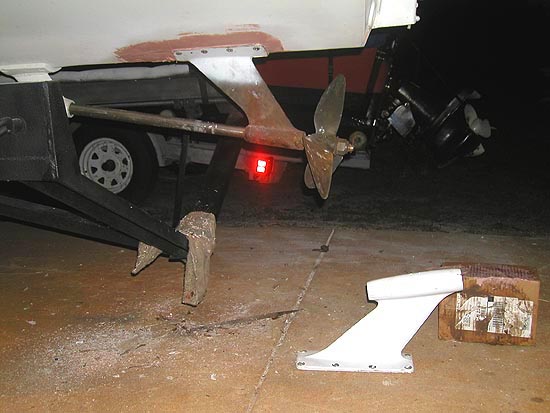
Ever since Ferd came up with the original strut just 4 days after I spent 10 days making another, borrowed strut work it has drove me nuts. The whole time the strut that belongs on the boat sat in front me on my work bench for the last six months and not where it belongs, on the boat. I had another strut on the boat along with the pad I had to build to make it work. The pad wouldnt affect the running of the boat in the water but I was afraid of people would say after seeing it when on the trailer. Whats that as they pointed and laughed.
The only thing was holding me back was I knew how the pad was built. It was not going to come off easy. Finding the original bolt holes also was going to be a trick. So I pulled the rudder and driveshaft and then spent about 4 hours slowly destroying what I had built. Got it down to the original pad height more or less. Then had to add a couple layers of glass to build it back up where putty was used before. Found the outline of a few of the eight holes that needed to be drilled out for the original bolt pattern. Then as I put a layer of glass on the top I will drill them out from the bottom and vice versa with the bottom layers. Got the strut lined up and bolted in place. Then proceeded to fix the fiberglass around it. It was not the bad. The Bondo makes it look worse then it is and no I didnt just fill it with Bondo. All necessary glass work was done first and then fiberglass Bondo was used for the first and second coat. Just using the red Bondo for a final coat. Should be able to finish it up tomorrow.
Took my time, got a late start bla, bla, bla . Got finished up a little but it was the first nice day of the year so what the hell!
So being it was nice out and already having all the bull work done the day before I finished the project like some of my perfectionist friends would have.
I got the paint matched up about 98% and for the bottom thats fine. I also spent 4 hours polishing the prop. It needs to be reworked but at least it dont have paint all over it and feel like sandpaper anymore. The rudder is back on and all the steering is hooked back up. A couple coats of wax and it should be all set.
Now Im back where I started at a couple days ago but there is something that feels good about that.
Finally I'm starting to move in the right direction.
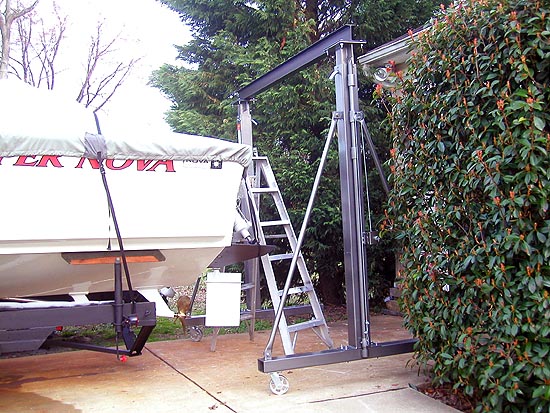
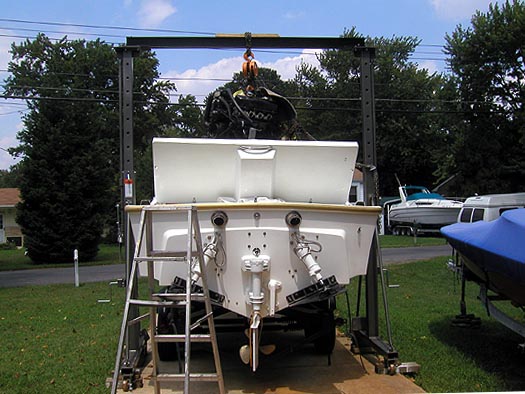
Been trying to figure out since I got this boat how to get the motors in short of using a tree and a rope. Ferd offered to use his crane but that meant packing everything up and moving it all over to his place. Motors, shafts, tools, every little piece and then was doing it at a strange place and during his busy season would have just add to the insanity. So that's was a last option. Then there was renting a forklift. There was a couple difficulties that would have had to be overcome but it would have worked. The main issue with it was the money. About $300 for a weekend. A bigger piece of equipment would have cost even more.
So I searched the web and come up with that I should use a gantry crane. I ended up buying one from Harbor Freight. It came down to price. With a promo code I found (20% off) I ended up getting one to my house for less then the list price.
I figure if I use it two times it's paid for so as much as I didn't want to do it but it had to be done.
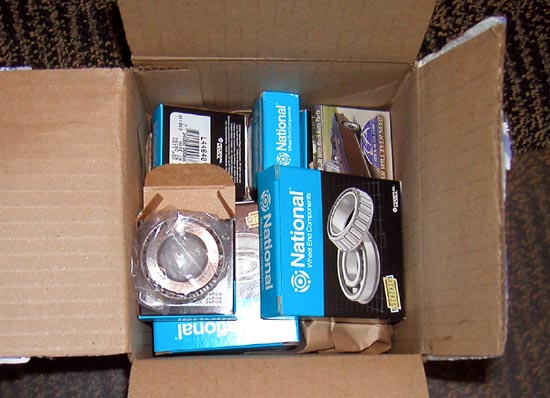
I couldnt even think about taking this boat trailer any distance without these in stock. As Im sure you can tell they are wheel bearings. The thing about these is they are about impossible to find and when you can find them they are out of stock for months. Not something you want to deal with on the side of the road. Let alone in some strange area. So they have been on order for a while and showed up out of the blue today and the rest is supposed to be here next week. Again wow!
So Ive got a complete set (4) of the trailer bearings and hub races for just in case, already did new heavy duty slotted disk breaks for the van so there wont be any over heating issues and enough stopping power I can turn the whole rig inside out. Add in the new A/T tires that I had to buy for the van (it just needed tires) but I had towing in mind when I picked them. I should be good to go. Or tow. Lol
Nothing on the gear box. Doesnt matter, its to late anyway. I guess it will happen someday. Whats another few months when its been 19 already.
Im working on the 19 now. I figure if it will stop raining it should be finished in a few weeks or so. I will deal with this V drive issue then but some plans are already in the works and could be done sooner.
I have nothing new to report. The boat is ready for power but the V drive box is still not done. I've asked for it back no matter what stage of completion it is in. After I finish the refresh of the 19 I will get on it myself even if I have to learn how to build these damn things. But it shouldn't come to that. I hope.
Just to prove that I have not just forgot about it and moved on, I was doing one of my web searches just looking for things and what did I run across? The original I.D. tags for the Thunderbird trailer. Some guy in California makes them for old RV restorations. I think he thought I was a little crazy wanting them for a boat trailer but when I sent a picture of the rig with the raceboat sitting on top I think it changed his mind. He is even painting them in the original colors. I spent a month working on the trailer just getting it road ready. This will be a nice touch.
The tags came in and they are better then expected. I had to get all stainless steel hardware to attach these to the trailer. I don't want to take the risk of loosing one with rivets.
And then there is the box. The scourge of my existence.
All I kept hearing was no, no, no. You cant do this, you cant do that, you have the wrong parts, wrong, wrong, wrong. You dont know what you are doing. Put it on a shelf and build a C500 split case or send it to us for a expensive rebuild. You need new gears, that will be 2500.00 to start . Just give up and go away!
No one said I could do it until the other day when I figured it out for myself and all Ive got to say is this.
And this,
And this,
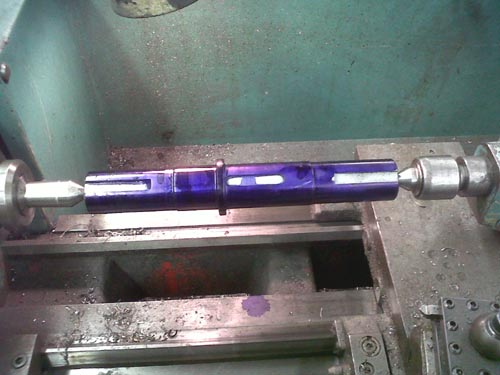
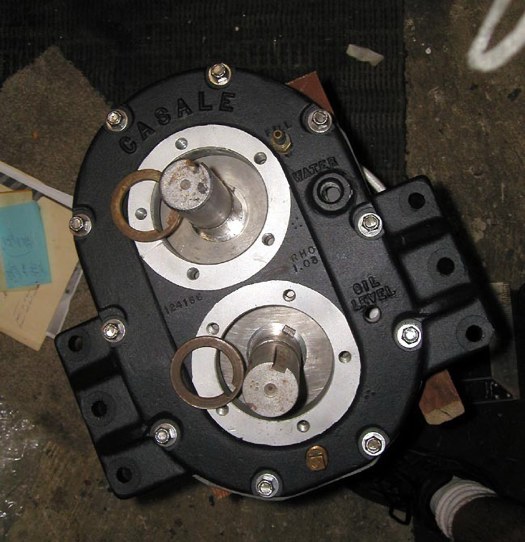
Did what they call a dry stack today just to get all the measurements for the Arbor shims I will need. Also figured out how it all goes together. Glad I did a dry stack because I would have been taking it apart anyway to fix what I didnt do right on my first attempt. In the process I ripped my brand new home made case gasket. The parts store was closed so I couldnt start the real build tonight but there is always tomorrow. I already made all the rest of the gaskets or what V drive people call shims. Now its just waiting on the Arbor shims to come in and it can be finished up and it can go in the boat.
The V drive that has traveled thousands of mile and finally may do one or two under it's own power soon. Fingers are crossed.
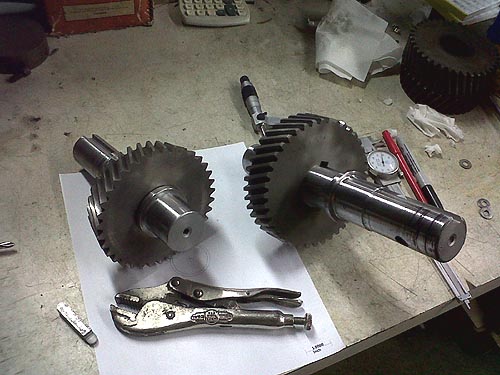
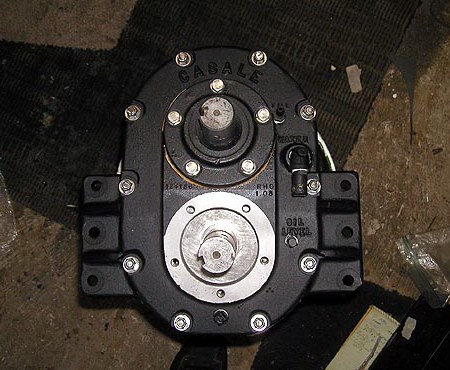
So far so good. Got it about 90% together. Understanding more as I go. I was able to use the two shims I had to finish the top side. Just dumb luck the two together came out exactly what was needed. Gears have a backlash of .008 which is perfect. Everything spins free except for the normal drag of the bearings and seals.
I ordered 3 different sizes shims in packs of 10 because the variables I was having due to it not being a finish build yesterday. Now I need 2 out of one pack and 1 out of another and dont even need the third size at all. Oh well, Ill have them on hand if I want to switch the drive around to where one of the motors is connected to the prop shaft.
I dont care what has been said in the past. This boat has a right hand prop on it from 1969. In a size that a lot of boats would never use. Also if I wanted to run a left hand prop and could drop the $500 it would cost to get one I would have to change a motor rotation around and match the cam in the other motor and thats another couple grand I dont have right now. So both motors are going to the top shaft.
With my 2 motors I should barely be at 50% of the handling capacity of the V drive so alls good there and like I said I can change it back and would only need a gasket set (or a roll being I have to cut my own).
Im starting to get excited.
If it dont work I'll have to work on fixing it over the winter but at least I can get the motors in the boat and out of the garage.
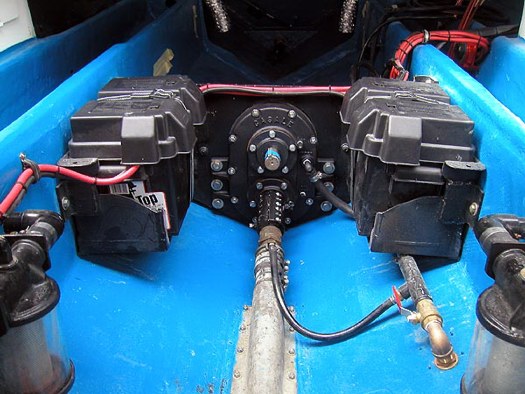
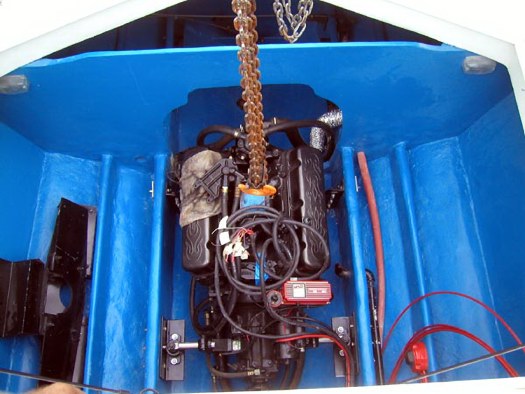
After the V drive build I was oh so ready to get the motors in.
So I got the gantry crane all jacked up and leveled. Just crank up the handles on the sides of it and it was 12 foot tall. Got the boat to the end of the driveway and a bit out in the street and then brought out a motor. Hooked it up to the chain hoist and started pulling the lift chain. And pulling and pulling and pulling. Never had a motor that high that didnt have a forklift attached to it. Then slid the boat back carefully being I only had 3 to 4 inches on each side of the gantry and then dropped them in. Im not going to sit here and say it was a piece of cake but it got done.
It took about a day to get each motor in. Between setting up for each motor lift, having to move the boat around and then fitting motors and transmissions to where basically there is nothing but a blank slate took some time. Then I had to finish the motor mounts. Meaning I had to drill out all the holes to the mounts after the motors were in place being I only did the top hole when in the garage to allow for the maximum adjustment. But that meant I had to do all the drilling in very limited space and at a 90* angle. Lots of time, broken knuckles and sore forearms.
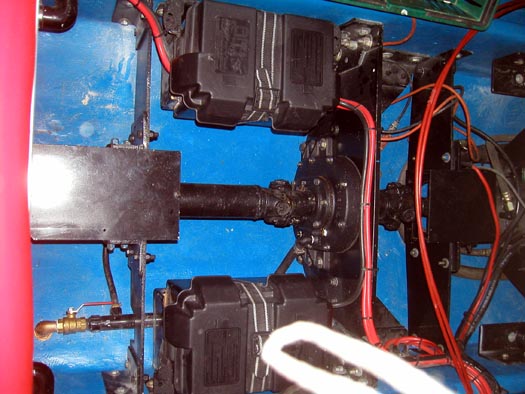
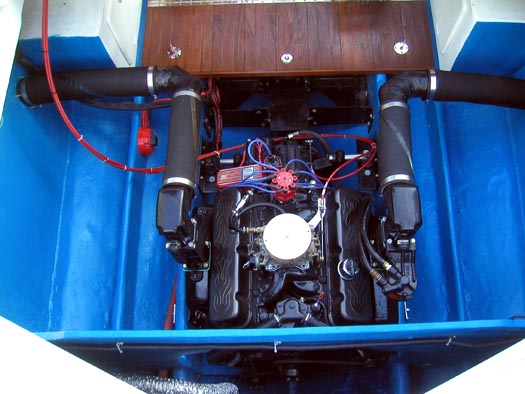
Add in another day of getting the driveshaft cages customized, put back together and installed. Im now up to the point of wiring, plumbing and exhaust. Or work, work, work.
Its funny, here I thought I had all this room but by the time you get everything installed room is becoming very scarce. Motors reach from bow to stern with everything else that make them work is in between. With no deck in place its a bit of a balancing act just to get around but things are moving along.
The last couple days its been raining so its not moving as fast as I would like but . Ive reached a roadblock anyway that will take a couple days to fix so it will at least give me time to regroup and that was very needed.
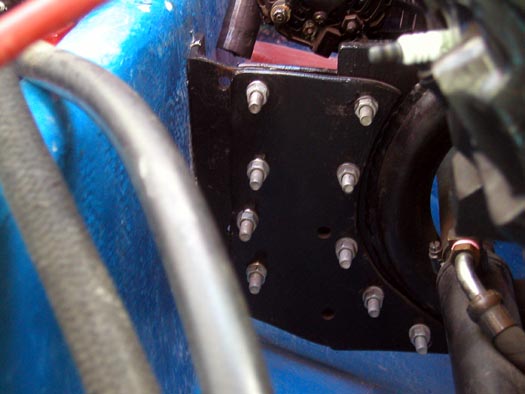
Like said before the driveshaft cages are in. Not really sure how they had them before and I knew where the mounting holes in the stringers were. I tried every conceivable combination in every direction to make them fit with no luck. So I had to do some slight modifications to them. After cutting some of them away and adding new metal to strengthen them back up I finally did get them installed. At least now if a driveshaft breaks loose its not coming through the deck and into the cockpit. But there goes another day with a trip or two to the Home Depot.
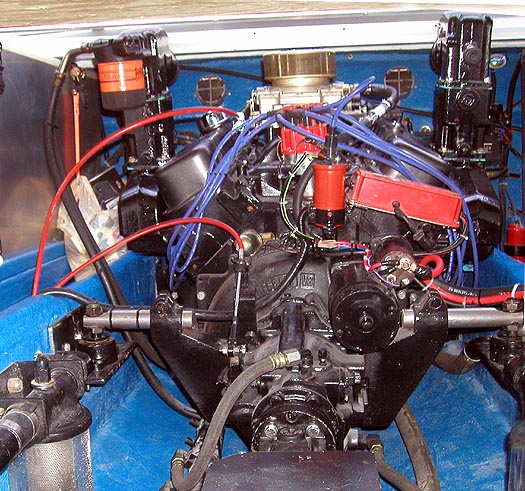
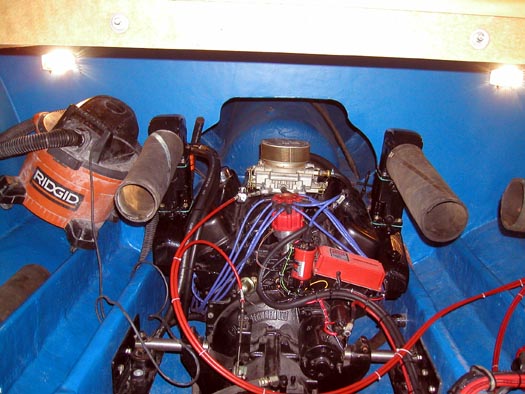
From there the rest of the motor builds were on. Carburetors, distributors, plugs, wires, fuel lines, control cables and then there was routing everything. I still think I have a day of final straightening out stuff. I kind of gave up on it until everything is done due to having to take many things apart again after being what I thought was done.
Then came the exhaust. The scariest part for me. If it doesnt work out my options are very limited on what I could do next.
First the aluminum exhaust manifolds. The front motor was a bitch to get installed and Im not sure Im done yet. Not really happy about the ways the water lines run and I didnt have any one inch heated hose in stock so I had to order some more of it before I can make changes. The rear motors manifolds went on pretty easy. I then added the six inch riser spacers to bring them up more to the level of the exhaust ports. At first glance all seemed good to go. I then add the stainless steel risers to both motors. Everything still looked good.
Started laying out the tube to connect the risers to the exhaust ports and thats when things started to go south. Surprisingly to me the rear motor exhaust lined up perfect. Sitting in my driveway the boat has a slight bow down angle but there is still a nice drop from riser to the port. When in the water the angle should be even better.
Then came the front motor. The port side laid out fine. It had a down slope that was borderline in the driveway but when in the water should have been a lot better. And then I started the starboard side. Got my measurements, cut my hose connected up the elbow with the port and the manifold, something was not right. The hose that came off the manifold was at a angle that it ran back towards the manifold. So I tried some bending and pulling to make it fit right but nothing worked.
I just couldnt figure out why one side was cool and the other wasnt. Then on one of my trips to the garage for supplies I got out a tape measure and measured the height of the exhaust ports from the outside. Ive had this boat two years, been over every square inch a hundred time and I guess looking at it a inch a time I never saw the big picture. I found out that the exhaust port on the Starboard (drivers) side is two inches higher then it is on the Port side. One last twist for this rebuild. Go figure. So I ordered three inch exhaust spacers to add to the other ones on this motor. Just when I thought I was done .
Another three inches should make it work out right and should be pretty safe with the internal flappers but now the waiting game begins.
Tomorrow I have to run up to the hydraulic supply place to get 16 of the four inch pipe clamps. I was going to use regular hose clamps being I have a ton of them but after thinking I would need to install 32 of them on this very stiff hose I decided that it would be a much better way to go.
Looks like the two day rain is starting to pass on radar so its time to go back to work. Updates will follow.
The last couple days have been spent tying up loose ends.
Started off by finishing off the rear engines exhaust. It was already fitted up. Just had to wait until Monday to buy the hose clamps I wanted to use. I forgot how much they cost and had a bit of sticker shock when the total came for 16 of them but it had to be done. Everything is just safer overall, cleaner looking and easier to install to with these clamps.
Straightened out the wires, zip tied up anything that was loose and anything else that was needed on that motor.
Yesterday, while I was still waiting on parts I thought I might as well make a couple things more permanent even thought it hasnt been proven that I wont be taking them back out for some reason.
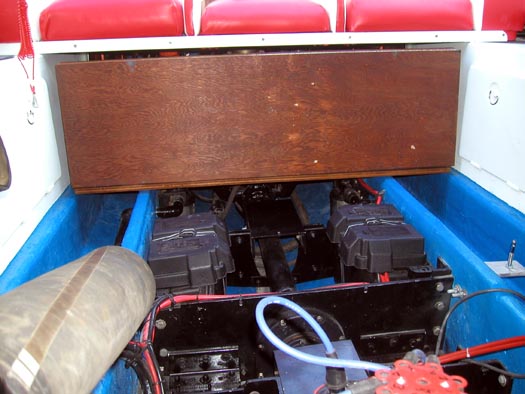
I drilled out and lag bolted the seat down to the side boxes (old gas tanks) from the inside. Drilled out and bolted the rear hatch cross support (basically the 4X4 that holds the rear hatch up).
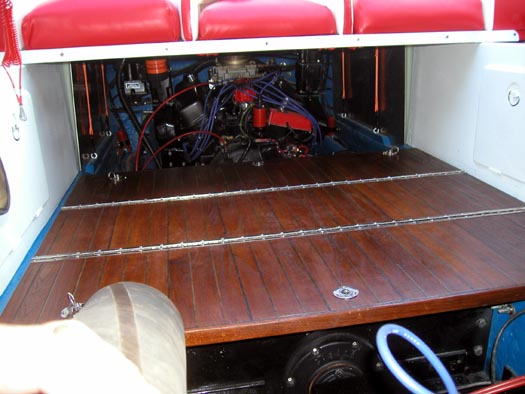
Then I tackled the main deck. A bit more tricky. I cut the once one piece deck in three pieces and added piano hinges so it could roll up but that meant I couldnt bolt it down so to speak. So I planned on using four hood pins, one in each corner to hold the deck in place but allow for a quick release when needed.
Started off with a simple L chunk of aluminum drilled out to use two bolts in the bottom and a single bolt/pin in the top. Got them just under the where the deck would sit and marked and drilled out the stringers. Got them bolted up and then marked the holes in the deck through the Ls and drilled them out. Put it all together just like you would for a car and
Even though the concept and building of most of the deck and supports was done last year it fit in quite well. I mean it took some time (rest of the day) to finish but there was no real problems and dont look half bad either.
And yes it works. Just pull the pins. Give the pull tab a yank and up it comes. Flip the first panel over the second and the two panels roll over on to the third. From front to back or back to front. It works both ways. I almost wish I would have spent a little more time on the bottom side now but there's always later for that. An added bonus is if you roll up the front two on to the third it comes out even with the seat. Almost like it was planned that way. lol
Today started off with the exhaust spacers showing up. Had to clean them up (even new the factory paint overspray on the gasket faces was excessive) and painted. By the time I got the exhaust in the boat broken down, fished two washers out of the exhaust with a coat hanger (ya I said two, didnt learn the first time) and got the new spacers in and bolted up the UPS guy showed up with the one inch hose that I need to finish off the cooling system. A couple of tough hoses to replace later and another hour finishing up the exhaust tubes and this projects build stage is officially done.
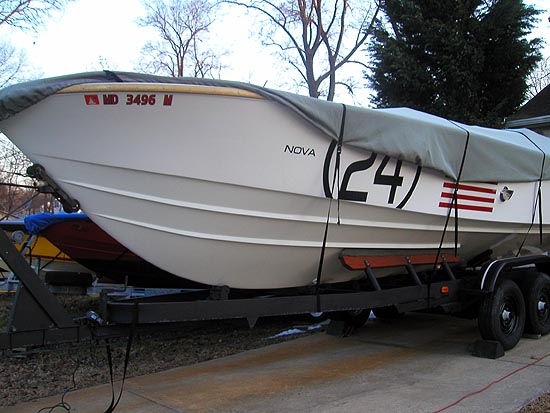
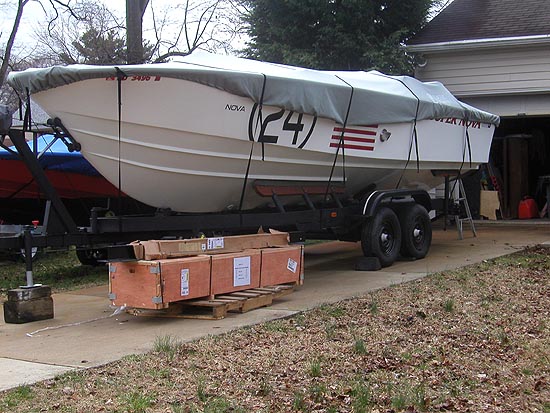
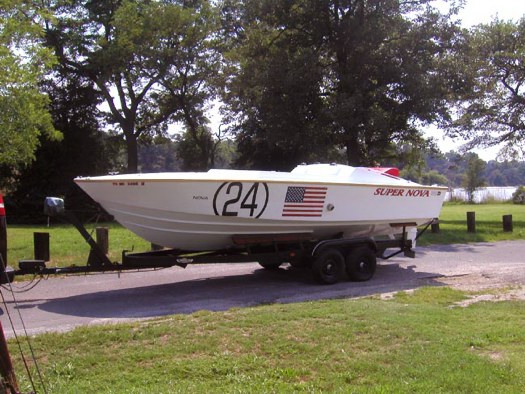
Two years and eleven days from the first night it filled my driveway.
I then spent the next hour vacuuming everything I could being the shop-vac was also leaving the boat. No more drilling into or cutting anything is on the plan so it was time. It will be missed. All boats should have a shop-vac attachment.
It now needs gas. Lots of it. Then the spinning of the motors and transmissions for the first time in a while begins. The motors have only been spun over by hand now and then since they were built eighteen months ago. A couple times I primed the oil system by spinning the oil pump. Did it a day before each install. The transmissions Ive never seen run but both were full of clean fluid, didnt leak and Ferd said worked. Fingers are crossed. Strut placement, motor placement, the V drive. OMG! Everything is crossed ..
Got a late start today but when I did get going the first thing was getting the boat going. Meaning getting it uncovered completely, all the straps removed, hatches locked, bearing greased, tie down straps on, hooked up to the truck and off we went. To the gas station. The tanks have never had a drop of gas in them and I was not toting gas at 5 gallons a trip so it had to be done.
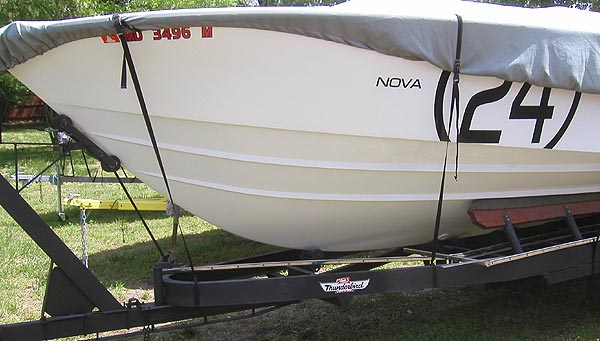
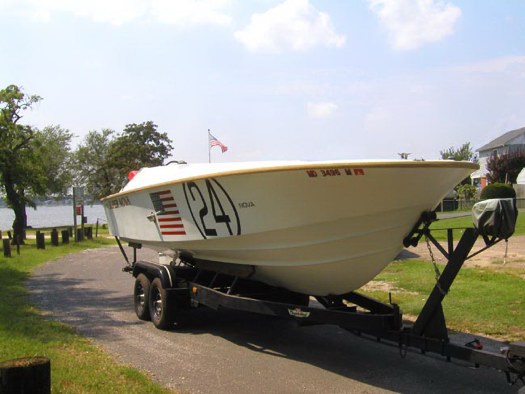
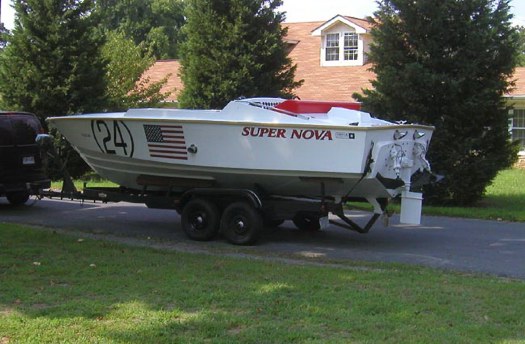
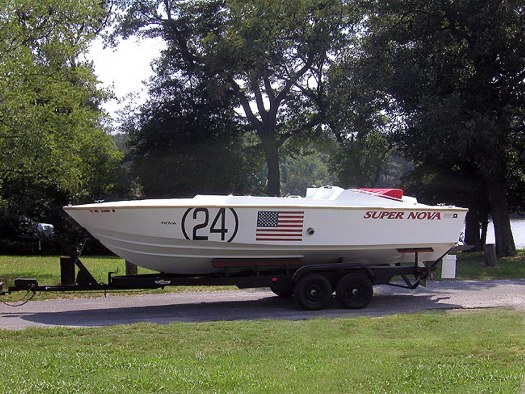
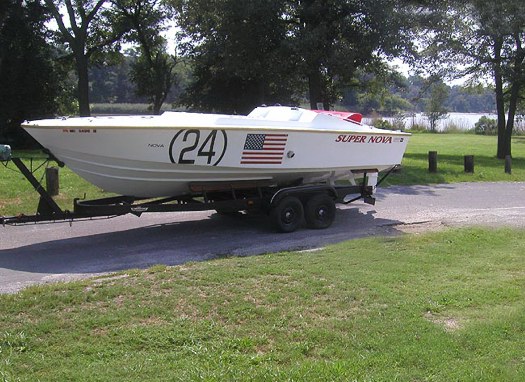
On the way I decided to stop at the park to get a couple glamour shots just for kicks.
I get back to the house from the gas station trip and checked all the hubs on the trailer with my Infrared Temperature Sensor and all was good. Start sweeping out the driveway and the thunder started. Get the boat back in the driveway and covered up just in time before the rain came. And it rained and rained and rained until dark. So no attempt on a motor start today.
I did get all the 12 volt wiring for the winch done in the truck so at least I got something done.
No pictures today. Just to much going on to get the camera out.
Between life that doesnt involve boats and couple other things I got a mid day start.
Got a few loose ends done and started to prep the whole cooling systems for its first taste of water. Plug the garden hose in the transom and proceeded to feel some things out (basically checking for leaks). Found one drain plug in one cooler was not in. That proceeded to put about 20 gallons of water in the boat. Got that taken care of. Then figured out how to use the valves in the back to allow for a pressure relief so the water intake system would not be under pressure when using the hose.
Time to start the front motor. But before I did I hit the switch for the fuel pump and watched. Ive had a fuel pressure issue before on the 19 so when ever I use a aftermarket setup I keep a close eye on them until proven. Well this system failed from the start. Not that there is anything wrong with what I got except for the pressure of the pump being factory set at 7psi and Edelbrocks like 5.5psi so I have to get fuel regulators.
The nice thing about having a clear fuel filter and an on/off switch is I could be the regulator. So I fill the carb, let a little pressure build and hit the key. Big cloud of black smoke (18 months of fogging oil) and it started right up like it had always been there. I got good enough regulating the fuel pressure that I could tune the motor and still kept it fuel happy.
Did a 15 minute break in. Really wasnt necessary being it was the same old cam just new lifters but what the hell. Helped seat the rings. Had 75psi oil pressure and never went above 150*. Shut it down, check the fluids and top off and its time to go to the next one.
Im holding off on sticking them in gear until after the motors.
So I go to the rear motor. Get it all prepped up and ready to go. Hit the key, half a rotation and then click, click, click. I fooled with the starter a couple more minutes trying to get it to work but then figured I had to pull it. Lucky enough over the winter I was using it to turn the motor over. Being it is the reverse rotation motor you cant use the nut on the front of the crank because the motor spins backwards and when you crank on it that way it just unbolts. So I kept my eyes open for a new/used reverse rotation starter and found one a couple months later and buy it just in case. As I was installing it I have my fingers crossed that I didnt get ripped off last winter. Hit the key and it spins right over. Accept now I have the distributor in backwards (popping through the carb). Get it put in right just in time for it to start raining again. And again it rained for hours and extremely hard. I guess I will give it another try tomorrow.
Fixed a couple small things like the tach outputs and such. Moved on to the rear motor. Pulled the number one plug and got the motor into number one firing position and reset the distributor. Still couldnt get it started. Pulled my wiring harness apart and checked power going to the MSD box. All was good. Then checked spark at the plugs and there was none.
Changed out the coil with one I know was good. Checked spark at the plug again. None. Get online and find the troubleshooting guide for an MSD 6400. Run through it and find the box is bad. Another eBay buy that was a POS. Sadly again I bought it 15 months ago and even being DOA and I cant do nothing but eat it. If someone wrote to me 15 months later and said the box was bad I would laugh at me to. Thats the problem with buying something that you are not going to check immediately. May save some money but theres a risk.
Working on getting a new one but Im on hold for the next couple days until the fuel pressure regulators and I can get a new/different MSD box. Soon.
Been fooling with the rear (reverse rotation) motor. Its not been going as smooth as I hoped.
Got the new MSD box and when I did get it started it had some rattles it shouldnt have. Did about everything I could to try to fix it but no luck. So it was time to start digging.
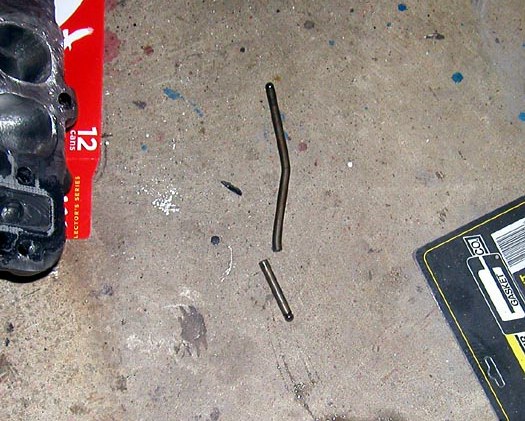
After pulling some plug wires when it was running I narrowed it down to one side of the two. Then took apart the exhaust on that side and pulled the valve cover. Found two rockers just sitting there. One pushrod was out of its cup and the other . well you can see in the picture. The sad thing was I couldnt get the part that broke off out from under the intake out no matter how I fished for it. Then with my magnetic stick I ended up pulling a lifter out of it's hole and fate was sealed. The intake had to come off.
Got down to the second to last bolt on the intake and it snapped off. Brand new bolt and while I was taking it out.
So I spent the better part of the day drilling out and attempting to get out the broken bolt. Finally gave up about 7pm last night and pulled out the Time Cert kit. It was for a head bolt but after I mangled the hole there was no other option. Did the steps in the kit and got the insert in. It will be a bigger bolt but a lot cheaper and easier then pulling the head and having it drilled out if not replaced altogether. I will start putting it back together today and see where it stands after that.
Its been a few days and to honest Ive been debating on if I wanted to add this at all. Everyone loves a happy ending but it always dont go that way ..yet.
Got the rear motor all fixed up and ready to go. Then it started quit easy. Set the idle and timing. Its purring like a kitten and then I notice it. White bubbles coming up around the distributor from inside the motor. Shut the motor down and check the oil dipstick. It was full of water and I mean full. Not exhaust full but like when the timing cover sprung a leak in a Mopar I had once. Just pumped full right to the underside of the intake. There is no way the exhaust when running would do that.
After about 10 minutes of total disgust and wondering what I was going to do I knew what I had to do but it would have to start the next day being it was getting dark.
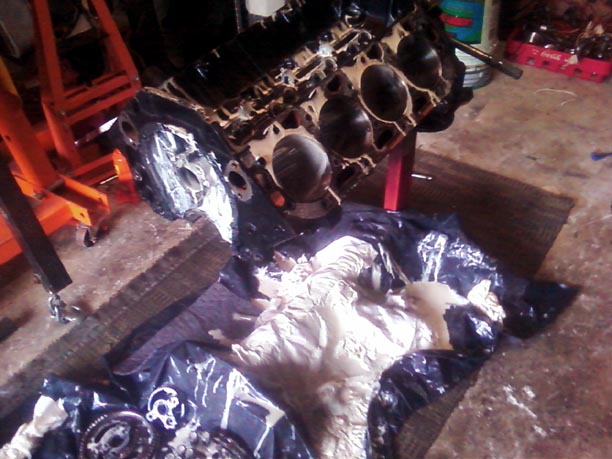
So now the mission is as quick as possible save what is not wrong with the motor and figure out what was. So I spent the day taking everything apart that was needed to get the motor out and then everything off the motor so it would come out.
From starting from scratch it didnt take as long as I thought it would. Even having to set up the gantry crane, with a little help from the wife the motor was in the garage before dark. Then the fun began.
First was to get the 10+ gallons of a nice mocha color, water and oil salad dressing out of the motor. Started draining it about 8pm and was still dumping buckets the next day. After a trip to the dump I had 18 hours just getting it drained. Then I proceed to take it apart. It was like I never drained it. Turn the motor one way on the stand and the crap would pour out. Turn it another and more would pour out. As each piece came off I took it out to a piece of plywood out in the yard. When I got it all out side I sprayed everything down with multiple cans of engine cleaner, hosed it off and then scrubbed it all again with Royal Purple until my fingernails got soft. By the middle of the second day of that everything was clean again to the point I would work on them and try to figure out what happened.
The first clue was as I was taking the motor out of the boat I did find water in the exhaust manifolds runners. Nothing that filled the motor in 10 minutes when running but water is not supposed to be there at all. It would explain after not getting it started the first time how it could have bent two pushrods but not all this. Ive already come to the conclusion that the exhaust in the rear is going to have to be redesigned and for the most part everything has been ordered to do that. Again Im sure it would have worked when the boat was in the water but its not always in the water and I cant have it sucking up water and not work in the driveway.
So I move along on persevering the motor by wiping everything down again with paint thinner and then spraying it down with fogging oil. Then I take the heads apart for new seals and to clean out from under the rotators and just to be on the safe side, to check all the valves to make sure none of them are bent. Everything is fine and ready to be reinstalled when the seals in the rebuild kit show up.
I still havent found anything yet to cause this whole mess so I put on my good glasses and get out the good flashlight and start checking over the block for cracks, nothing. Move on to the heads. Check the one I did work to in the boat and find that when I installed the Time Sert I must have gone a little to deep with the drill bit and when you put the thread insert in you run a tool through it that expands it to lock it in place. Well the expansion must have been to much for it and the water jacket split at the intake bolt. Wide enough that I could see light through it.
Ding, ding, ding. We have a winner. I basically killed my motor. First by not having enough down angle on the exhaust and then by attempting to fix the damage it caused.
Parts are on order. Rings, bearings, gasket set, new/used rebuilt head, lifters, pushrods are on the way along with the exhaust parts. Just waiting on the UPS guy to stop by so I can get to work fixing my screw up.
The only picture I took of this whole mess and it's from my cell phone.
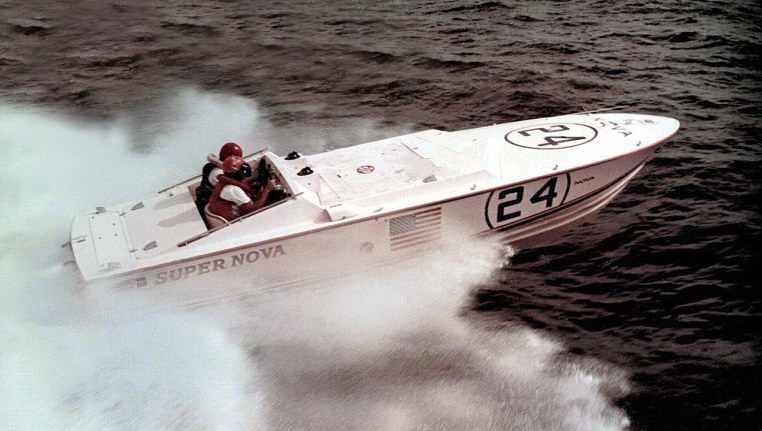
Its over. Finished. Complete. The Nova24 lives again!
Again its been a few days between posts but I've been real busy.
Put the 454 back together and between jury duty and all the continuous rain we have been having it took forever to get it reinstalled. But by this past Sunday afternoon (after it stopped raining for the day) I was ready for another attempt at getting it going and so I did.
Started right up. Tuned it right up. Purred like a kitten. I was kind of shocked. Setting the distributor I only missed the timing spec by two degrees. Again .shocked. After giving it a good run (in the driveway) and checking fluids I click it in gear. All is good again. It all spins nice.
What the hell, now was time to check the front motors transmission and make sure they dont run opposite or anything.
Went to put the B/W 1 to 1, 72C Velvet Drive in gear and nothing. I mean nothing. No grinding, no noise and most of all, no movement. I have no clue when it comes to boat transmissions or any transmissions for that matter. After some web searches I cant find anyone having a similar situation. I read if the clutches are bad it would lock in forward or make noise or something but again nothing. I even spun the driveshaft a few time and still nothing.
I do get a couple ideas on line but none of them are good and all but one is expensive. No matter what the transmission has to come out. So yesterday I proceed to do just that. One way or another it will be at least sitting on the garage floor and I will get it fixed when I can.
Come to find out it was my dumb ass fault.......thank god. The pump was in backward. It took all day to discover and fix but it is and works like it should now. Dodged a bullet on that one thats for sure.
I guess I can say with that the Nova24 race boat build is officially over. Yes it needs to be washed and detailed. And yes it needs a test drive or two hundred but everything works in the driveway so if anything happens from this point on it's fixing it, not building it. So as far as I'm concerned it's the end....... well, of the building stage anyway. lol
Now life begins again for it and I'm sure it's not going to be boring.