So here it is in the middle of winter and what's going on? Race boat repairs of course.
This is one project we started last Fall that we just had to get out of the garage. After having really good luck with the rear motors carburetor alterations we knew we had to do it to the front motors carburetor.
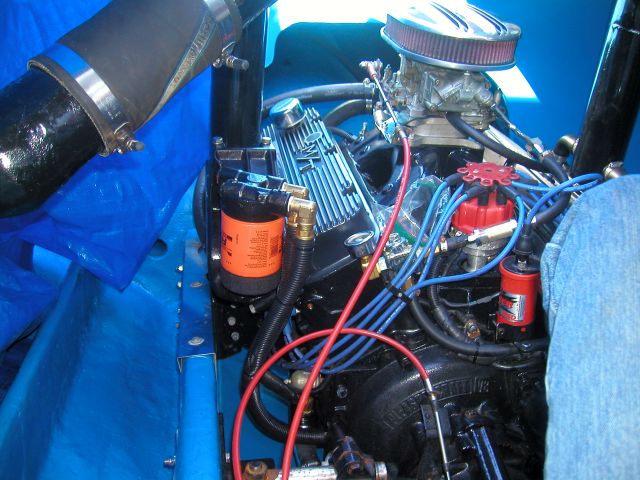
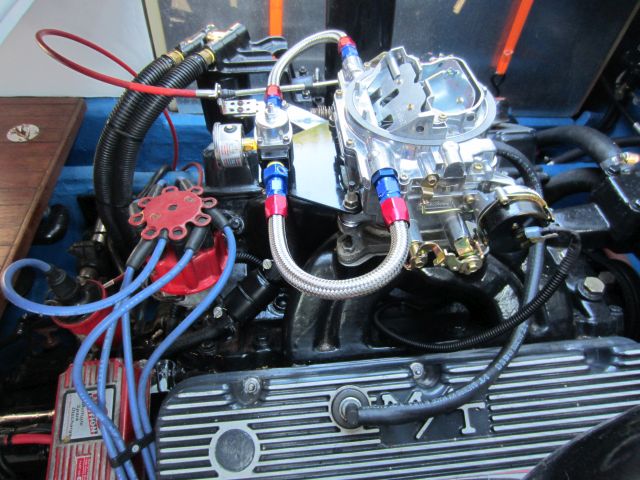
First its a Holley. Not my favorite carb for a boat, at least not this series but its what we have so we are staying with them until someone makes a donation of something better. lol. The issue I have found with Holley's is they dry up if not used a lot and leak. So after 5 years it needed a gasket set. I also wanted to change the power valves and most of all I wanted to drill the throttle plates. I know most will say if you are doing this there must be something wrong but these are not your typical street motors with stall converters, clutches and such. They want to run and run hard and nothing else. When they are idling they are loading up no matter how you set up the carbs so you set the idle up high and try not to idle too much. After rebuilding the drive train last summer, tightening it up considerably the motors have to be more under control now. Drilling the plates allows more air in and you drill them close to the carb's idle air bleeds that way it gives the mixture screws more control. Again, it really worked on the rear motor.
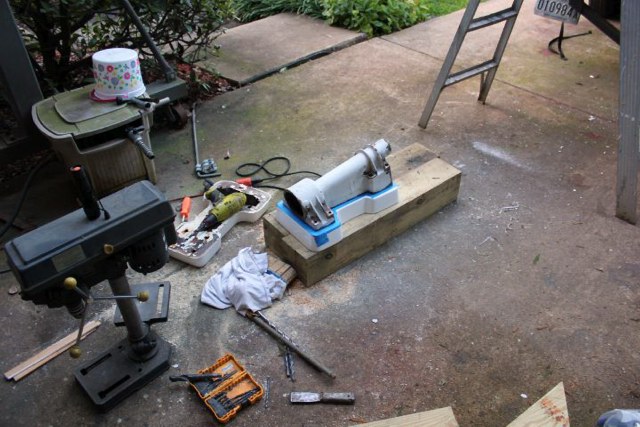
So when we winterized we pulled the carb off and put a cover plate on the intake to close it up. The weather turned nasty and the rebuild kit and new plates took a week or so to arrive and the next thing you know its rebuilt and sitting on our small shop desk (a safe space) for the last number of weeks. All it took was a one warm day and we had to install it to get it out of the way of the current project (1666 Donzi 16). We couldn't set the floats yet because we didn't want to power up the boat to do it so we'll wait until we wake it up this coming Spring.
Then there is this oil filter remote in the picture above. Its one of those things that there is always something else that comes up before it more important and then it never happens. A simple oil filter remote becomes an issue when you want it on the wrong side of the manifold facing the wrong direction. Mercruiser oil filter remotes go on the bow side of the motor in most cases. We already moved the oil filter remote to the back of the manifold on the rear motor and being the front motor sits so deep between the stringers the oil lines hit them going to it's remote, we knew we had to change it. Then the opportunity came for a new remote mount that has oil line ports out both sides when we needed a new one for our Donzi project. We get the new one for the race boat and use the old one on the Donzi. A win, win. So of course we had to do the swap while we were there for the carb so we would have the one we took off for the Donzi project.
Attempt number three.
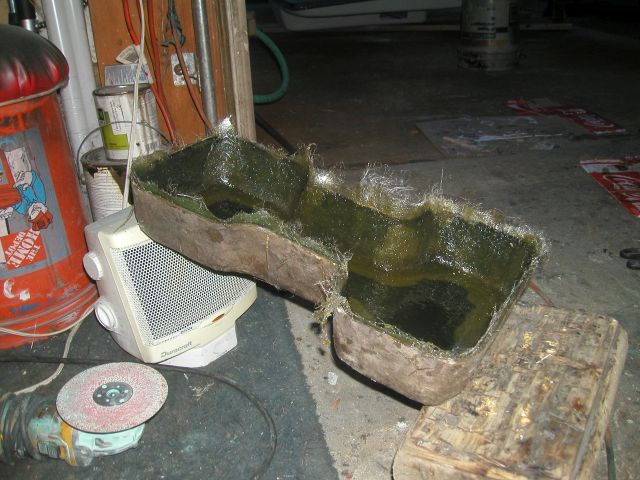
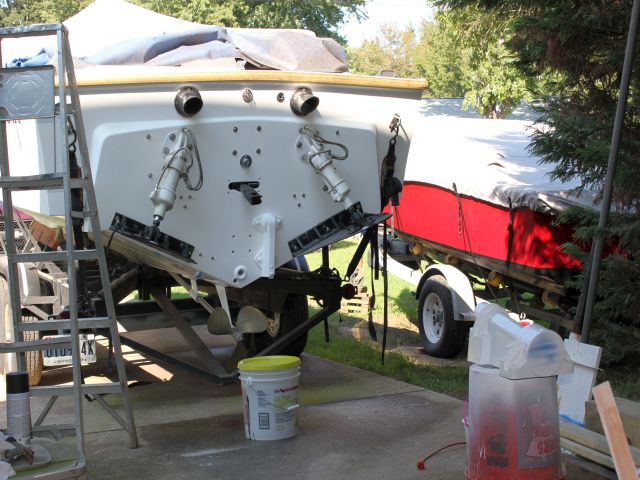
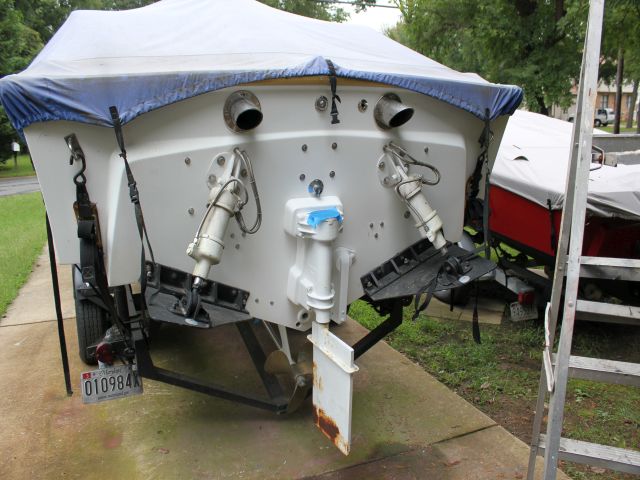
When we first got this unique Casale C-1000 V-Drive, besides being in pieces all it had was a length of rubber hose attached to the vent port that went to nothing. We figure it just hung in the bilge. Cant do that today for many reasons if not only for the mess in the bilge so we thought we were doing something when we put a small machine oil cup on the vent filled with breather filter fiber inside of it. It leaked. Not much but it was wet after a rough ride. I really hate gear oil. We then put a small motorcycle break reservoir attached with a short hose which also leaked for some unknown reason. So we decided to replace everything. In the process of doing this final replacement we found one of the fittings that was in the case we never take out for fear of damaging the threads had a small hairline crack in it and was probably the cause of the leak all along. So that was the last straw, we have had enough. After some research we bought this puke tank for some sort of oil system over flow but it was way too big. Enough so that the whole v-drive could have emptied into it two times with room to spare. Also it wouldn't fit under the deck when down and still be higher then the vent hole in the V-Drive so if something did go in it, it would drain back into the drive where it belongs. So we had to cut the tank in half and put the ends back together. Turned out pretty good and it still should be able to hold almost all of the fluid in the drive which should never happen but... Hopefully after finding the cracked fitting we wont need it now anyway being that we have the best V-drive over flow system known to man but we have it.
What can we say? This year was a bust. Never got the boat out at all. We are on hold until the spring of 2018.
Life, another house (got to make a living), a 1966 Donzi that should have been left in the woods where it was, damaged Nova19, etc, etc got in the way. But there is always something going on and one project we really need to do has to be done sooner then later. There is no other option at this point.
Here's something that we should have done years ago but as usual there was always something else that came up first. At this point with this project we can finally build on a solid base so to speak. The first goal was just getting it to float and maybe run 50 feet on the water under it's own power. After that it was taking it out for 20 minutes or less without killing a motor or the V-drive or something else major. We have come a long way from the early days. All the way up to having real classic race motors, new machined V-drive shafts, etc, etc,etc and finally we are starting to understand the go part of this boat. Now it's the control part that needs attention.
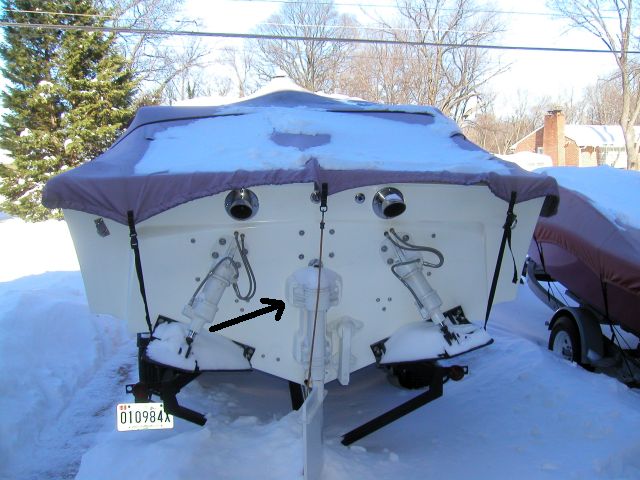
Even though its an old school rudder system its pretty intense and is what's needed for this boat. It's manual steering. Meaning that it's driven by two steering cables to a dual helm steering box. One cables pushes and one pulls all the time so it's stiffer to steer by design to begin with. It all has to work right and if it's not right and you know it.
One part of it is a spacer that holds the bronze rudder box off the transom a couple inches. Guess they wanted the rudder further back from the prop. The spacer was one piece the past owner didn't remake even though he made a mold to do it. When we first put the boat back together the original spacer needed a little fixing but it was good enough. Well, those days have passed. It's no longer solid so to speak. There is enough there to keep the rudder stable to a point but it only a matter of time it gives to much and bad things happen now that we have all this horsepower to control.
So we had the mold for the job kicking around the garage for years thanks to Ferd and we have been doing a lot of fiberglass re-coring to the Donzi project so... when figuring out the material list for the Donzi we made sure to add a little extra for this side project. Might as well. The Donzi is from the same time when Brownie was at Donzi so why not let one "Brownie boat" project pay for the other. With coring under my belt and having done transoms and such before this was still a little different. The thing has to be completely surrounded with fiberglass on all sides and have a solid wood core almost 2 inches think.
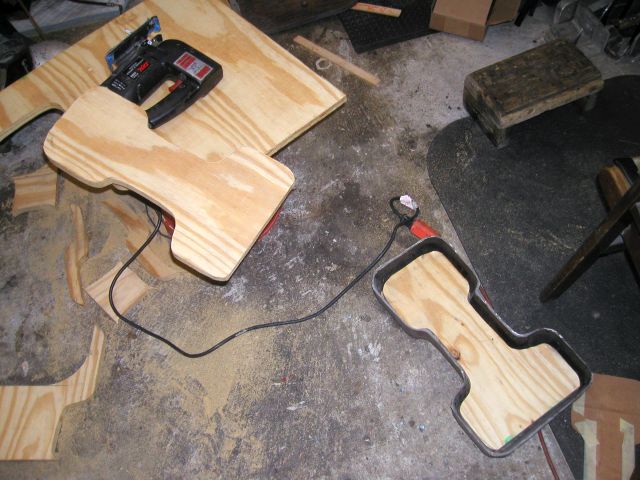
So I kind of tackled it like a mini enclosed transom. First we made patterns and cut out our plywood making each layer a little bigger then the last so it would taper out like the mold. Then we rounded all the edges of the wood core with a router and gave them all a rough sanding.
After the wood was done we cleaned the mold of years of garage dust and polished it up, so so. We know it's not going to be perfect. We then over the next two days we coated it in "mold release" a couple times and let that set up. Then it was time for fiberglass. To start off we painted on layers of just fiberglass resin (like a gel coat) and let it set up to build a thick glass resin only layer. To make sure the wood core didn't slide out to the edge or anything while building it we then did a few layers of glass mat inside the mold and built a shell for everything to go inside of.
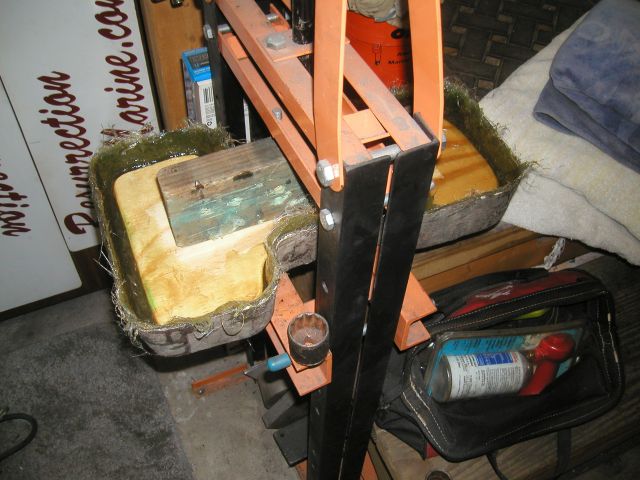
We know some would just start smashing glass and wood in there but we had the time and like said it was our first time around doing this. The shell took a number of times reinforcing corners and such and letting it set up before it was ready but when it was it was time to build something. Soak up a couple layers of mat and get it in the mold. Coat the wood with resin. Mix the rest of the resin in the cup with loose chop glass and pour it in the mold and throw the wood core on top of it all. As long as it took to get all the pieces in we only had time to do one layer at a time before it started to set up. So when we got the wood in we put it in our press and put enough pressure on it so the resin and chop glass oozed out the sides all around. For three layers of wood we had to do this letting each completely set up before starting the next.
We really need this thing to be solid. No air gaps throughout. With the torque it has to take there is no reason to do it if there is any chance it will fail.
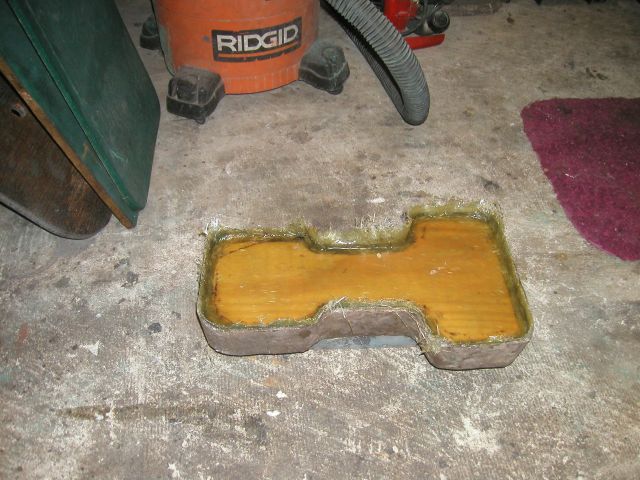
After the third time around we had a solid block. A real solid block!
It may have been solid but there was still exposed wood. More layers of mat and resin with some chop strand to build the glass up to the mold's edges. When repairing the original I had it in the mold and it came up to the edges so they should come out almost the same size.
For as small as it is it's taken me almost 10 days to get to this point. As cold as it out I usually only get to do one thing a day but wow that was a long time.
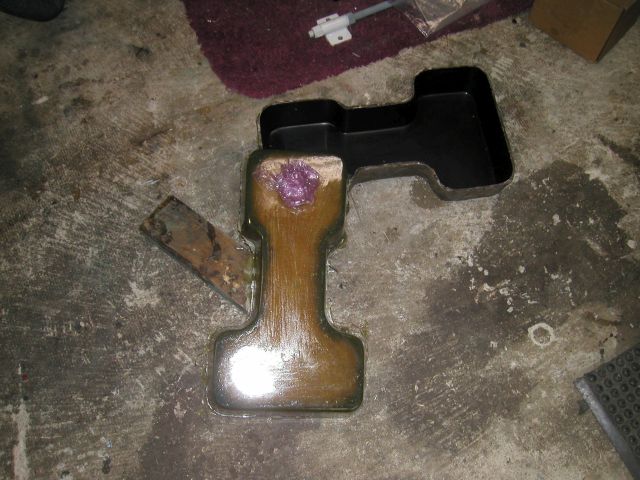
After multiple belt sanding's and building of glass on the back side to get it flat as it can be the time had come to pop it out of the mold. We had our reservations about it coming out due to all the work we had done to it, it stayed solid in the mold the whole time. We had been careful but only as careful as a belt sander can be. We flip it over and give it a couple taps with a rubber mallet. and it slid right out. The mold release seemed to have stayed with the new piece and not with the mold but it was no matter being we had to paint it to match the boat anyway. It just pealed off like shrink wrap in about 20 seconds so again no big deal.
Again, a real solid piece. No voids in any corner. No pox marks. All the wood core is centered and buried in glass with each layer connected to the outside edge.
Time to do some body work to it and get it ready for the coming Spring.
It's like deja vu all over again. We bought another house for a winter time project last February and we bit off a bit more then expected. Without taking a day off we didn't finish it until the end of July. Add in some of the other projects, recording setting rain fall and there wasn't much left of the summer but no matter what even if we had to stand in the snow the rudder project was getting completed.
So during rain outs of the other projects we went ahead and did the body work, primer and painting of the spacer. You still have to do every step like painting a boat even for something as small as this thing is.
Now comes the fun part. The boat is still together and under the exhaust and a number of other things the rudder assembly has to come completely apart and be removed. Not a simple task.
Again not a simple task but we have removed some of the rudder before when we had other problems to deal with like removing the prop shaft for the cutlass bearings but we never took this much of it apart before. Getting the rudder out of the housing and off the tiller was pretty straight forward. We then spent a couple more hours removing the rest.
The spacer didn't come apart of anything when removing but man it's a lot worse then we thought. The rudder was basically crushing it. It was compressing like sponge but only on one side which cocked the rudder slightly.
With it off we could now get the new holes lined up and drilled into the new spacer. The bolts go through the rudder box, the spacer and on through the transom so all the holes have to line up pretty perfect. Had pretty much anything in the garage that would spin a drill bit out with me in the driveway. Start with this one, on to that one, drilling, drilling, drilling.
After getting the old spacer off with all of it's sealant and such we were hoping that the new spacer would cover the old but when doing the final positioning of the spacer on the transom and using my 18" drill bit to final some holes we noticed that it fit exactly like the old but the old one had sealant that came past a little and long story short we had to fix the transom before it could go on because after it would be a pain in the ass to do.
So now it was totally ready for install and we were pulling out the body putty and sandpaper again. Primer, sand, primer, sand and then paint to be followed with some color sanding. Now it was the cleanest spot on the boat. lol.
Now to do everything in reverse. Like said the rudder housing and the spacer goes on in one shot through bolted to the transom. It all has to be smothered in 5200, slipped in place and bolted from the inside with eight half inch bolts. Once you start to torque down on all those heavy bolts 5200 came squeezing out everywhere. It was what we wanted but we could have done without the mess. Finally though, after all this time, it was on with it's new spacer.
We then let it set up for a couple days before we rehung the rudder back on her. Along with reinstalling the steering and putting the exhaust back together. By the time it was all done it was just better to let it sit over the winter. This Spring we will check the bolts again to make sure the are tight and we are done.
This has been an on going issue all the way back to the original Gen V motors we first used. Gen V BB Chevy's all used electric fuel pumps so we set the boat up that way. No matter what though we always had issues with the fuel pressure. After a number of fuel pumps we finally settled on a set of Carter Competition fuel pumps that were fine until we installed the Kiekhaefer motors with their Holly 850 double pumpers. I have never saw a carburetor so finicky then a Holley and to say they are overly complicated would be a understatement to say the least.
In the past we have rebuilt and changed about everything we could with these carburetors all the way down to drilling the throttle plates to try to lean it up a bit at idle. Always suspected that there was still fuel making its way past and flooding the carb. We already have fuel pressure regulators in the boat but they never seem like they were right. One time I would look at them they would have 3lbs of pressure and then the next they would have 8lbs. Set them again and they would be wrong again the next time. We are not sure if the regulators were junk or if the gages were wrong. The final straw was when we tapped on one just screwing around and each tap changed the pressure, in a boat that bangs around all the time...
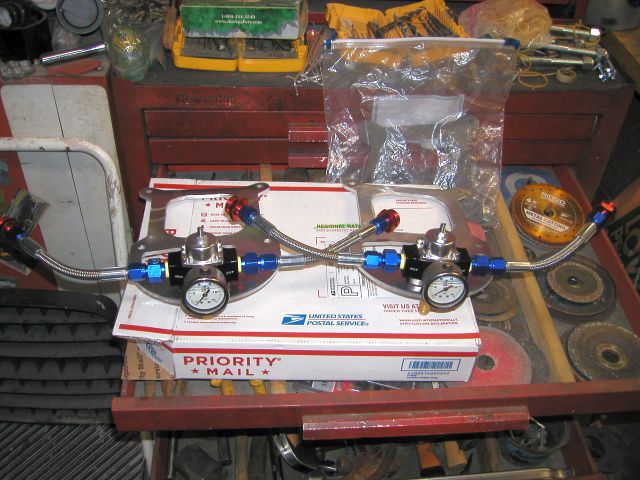
We are really trying to get this boat user friendly this year so over the winter we did it. Being there is twin's in this boat it means doing everything twice. So we started with a couple Holley HP Billet Fuel Pressure Regulators 12-840. Some of their better regulators and of coarse they are Holley so what can go wrong? We also add a couple Aeromotive Fuel Pressure Gauges 15632. Liquid filled and have a pressure relief valve to reset the gague. Then to get the original regulators mountings off the back of the motor and a little closer to the carbs we bought a couple of these mounting plates and fuel line kits off of eBay that puts the regulator right next to the carb's. This has to work.
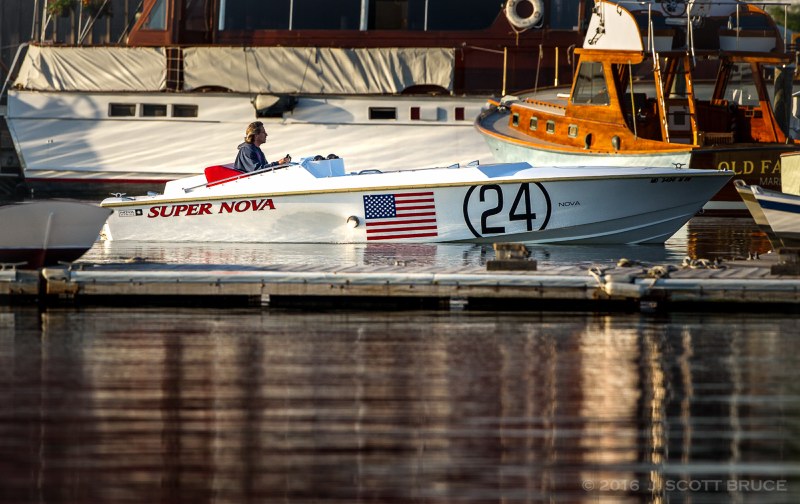
What can we say about the summer of 2019 and the Nova24 race boat? Well, we can and have said a lot. A real lot. More then we have ever said before. So much so that we started to video the going's on just to keep up. We had big big plans for the 24 this year and we were serious about them too.
So at first we decided to film the beginning of the season to show what it was like to take the cover off the boat for the first time in almost 18 months and what it takes to get it back to where it was before we put it away. One thing leads to another and we filmed the whole season from uncovering it from the first time to putting the cover on for the last time for the year and everything in between. It takes a lot more then it looks to take care of one of these 50 plus year old race boats. The video blog / logbook will explain why things happen how and when they do. If you want to know the whole story check out our video series, Race Boat Life.
Race Boat Life, the whole real story.
By episode IV or so we upgrade all of our camera and sound equipment for 1080hd.
Without watching Race Boat Life the short of it is, it was a long and a rewarding season. Like we said above we hadn't taken the boat cover off the race boat in about 18 months form when we started. It took two days of cleaning just to get it in good enough condition to work on it. We then attacked our fuel system upgrade and that's where the wheels fell off the train. First we get the new fuel regulation system installed and find out our fuel pumps sucked. I found out later the maker changed the specs on the fuel pumps to a much lower fuel pressure spec just a couple weeks before I called to complain they were not what they were supposed to be. This whole time I am trying to get the fuel pressure issue settled while dealing with out of spec fuel pumps that didn't come close to what spec I bought them for. So the next thing was new fuel pumps. After the fuel pumps everything was great until it was not again.
So we take the 24 out for a test drive and this time the Holley carburetors went insane. First they leaked, then the bowls would be dry or flooding. Then the fuel fill wouldn't keep up and they would be dry one second and flooding the next and you have to remember that these carbs have both been rebuild with the best I can do so once again we had to get out the checkbook. A set of new Edelbrock's AVS-2, 800cfm carbs. We then took a Edelbrock 750 marine carb and took it completely apart along with the new 800's and copied everything different in the 750 into the 800's. Wasn't as much as you would think. A drilled hole here and a gasket there and we were done.
After all that we found the fuel pump regulator bracket and fuel lines we bought over the winter were no longer usable. The fuel lines were short and the mounting plates wouldn't work being it was made for a Holley and not Edelbrock. So we once again got out the check book and bought new fittings and bradded hose to make our own fuel lines. Lucky enough we had a sheet of aluminum plate and decided to make our own mounting plates for the regulators. We actually like the plates we made more then the ones we bought. First they mounted on top of the carburetor bolts and not between the carb and intake. They were also a lot smaller.
It wasn't like we could just go to the money tree so that went on for a while. We put more money in the boat this year then we have over the last few years. It pretty much stayed that way until we put the cover on it for the last time for the season.
That sure is a Edelbrock dual feed carb.
We then chipped away at our master list of repairs and for the most part got it done. We also went out and burned a lot of gas. The boat is not perfect by a long shot but we really do think we made some serious progress toward it. Now we are just looking forward to a new season with the start we should have. We have been waiting a long time to get away from the major stuff and on to some of the minor things. Like one is we want to come up with 1 to 1 gears for the Casale C-1000. We have an idea on how to do it but just haven't found the parts yet.